How to connect Stripe to your kite.site
A step by step guid on connecting your Stripe account to your kite.site
16 Oct 2024
To start earning through your Kite.site account, you'll need to integrate a payment processor. Stripe is a great option for secure, global payment processing. In this guide, we’ll walk you through the steps to connect Stripe to your Kite.site account and simplify the payment process for your content creation business.
Why Use Stripe?
Stripe is widely used for its security features, ease of integration, and global reach. With Stripe, all payments are directly deposited into your connected bank account, and you can monitor your transactions seamlessly in the Kite.site dashboard.
Step-by-Step Guide to Connect Stripe to kite.site
Step 1: Log into Your Kite.site Account
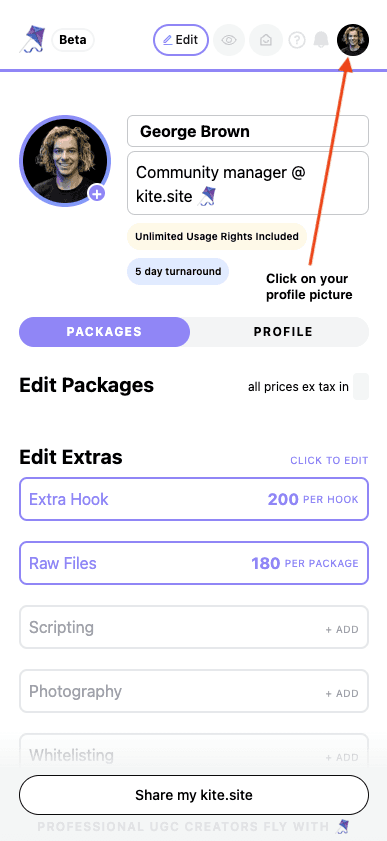
Navigate to the My Settings page by clicking on the icon in the top right hand corner
Sign in to your account using your email and password.
Step 2: Access the Stripe Integration Settings
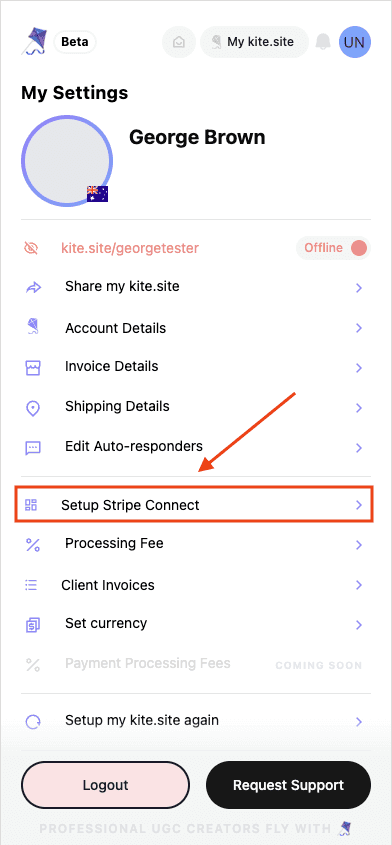
Once logged in, head to the Settings section in your kite.site dashboard.
From the menu, select Setup Stripe Connect.
Step 3: Create or Log into Your Stripe Account
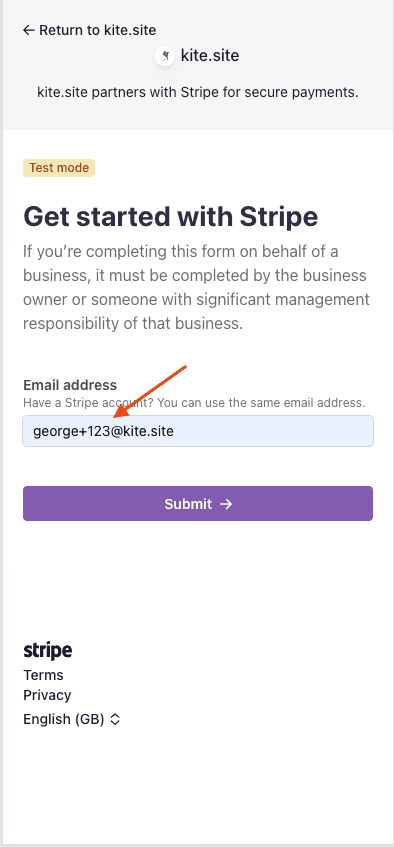
If you already have a Stripe account, sign in with your existing credentials.
If you don't have a Stripe account, follow the prompts to create a new account using your business email.
Step 4: Set Up Two-Factor Authentication
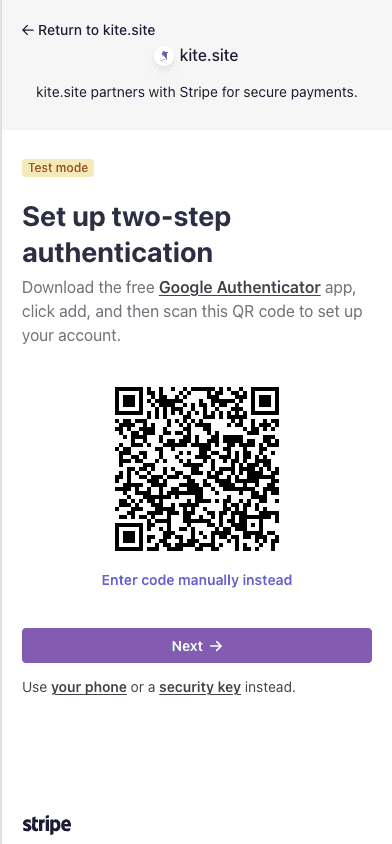
Stripe requires two-step authentication for enhanced security. Use the Google Authenticator app to scan the provided QR code.
Enter the code generated in your app to verify the connection.
Step 5: Verify Your Login
Once two-step authentication is set up, you’ll be prompted to enter the code to verify your login.
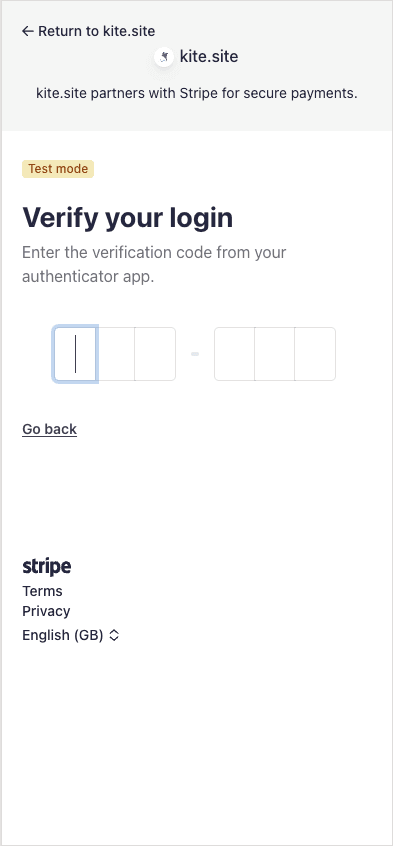
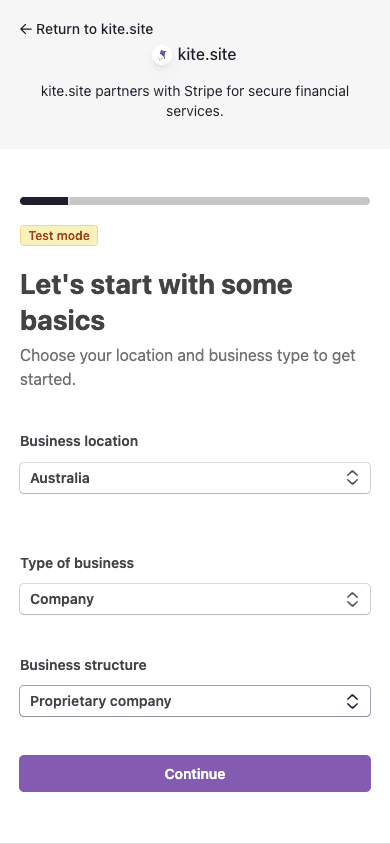
Step 6: Provide Your Business Details
Fill in your Business Location, Type of Business, and Business Structure. Select options based on your business’s location and structure.
Next, you will need to provide additional information about your business, such as your Legal Business Name, ABN/ACN, and Business Address.
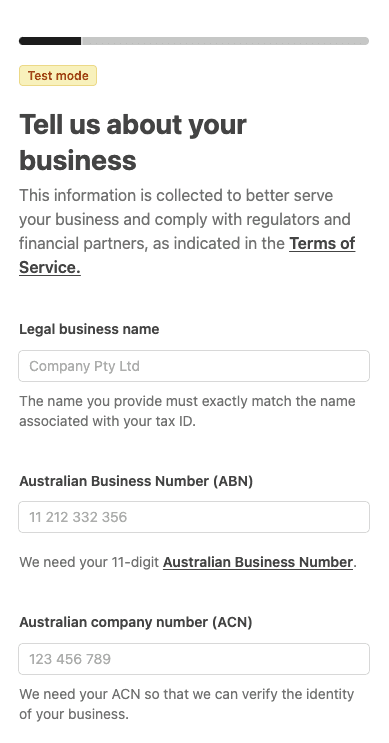
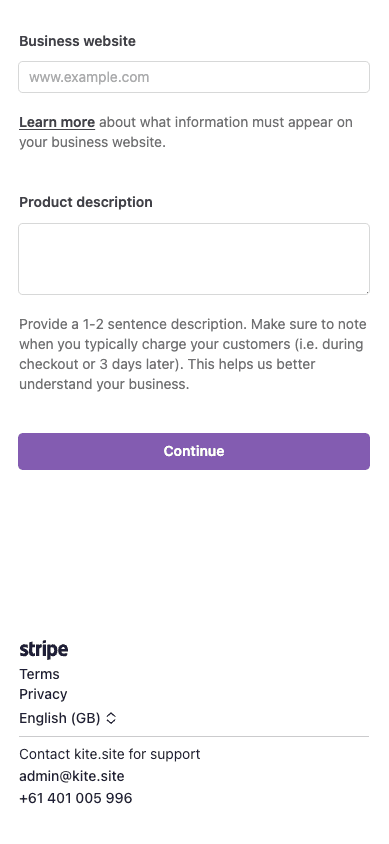
Step 7: Add Your Business Website and Product Description
You will be asked to provide your Business Website and a short Product Description. This helps Stripe understand the nature of your business.
Click Continue to finalize your setup.
Step 9: Confirm and Finalize the Setup
Review all the information you’ve provided and confirm your details.
You’ll be redirected back to Kite.site, where you should see a confirmation message that your Stripe account has been successfully connected.
Congratulations!
You’ve successfully integrated Stripe with your Kite.site account. You’re now ready to start accepting payments for your content creation services. All payments will be securely processed, and you'll be able to monitor transactions in your dashboard.

